 I started working on my Final for AECP Level 2. One of things we needed to do was to either Upcycle/Recycle something or submit an altered item.
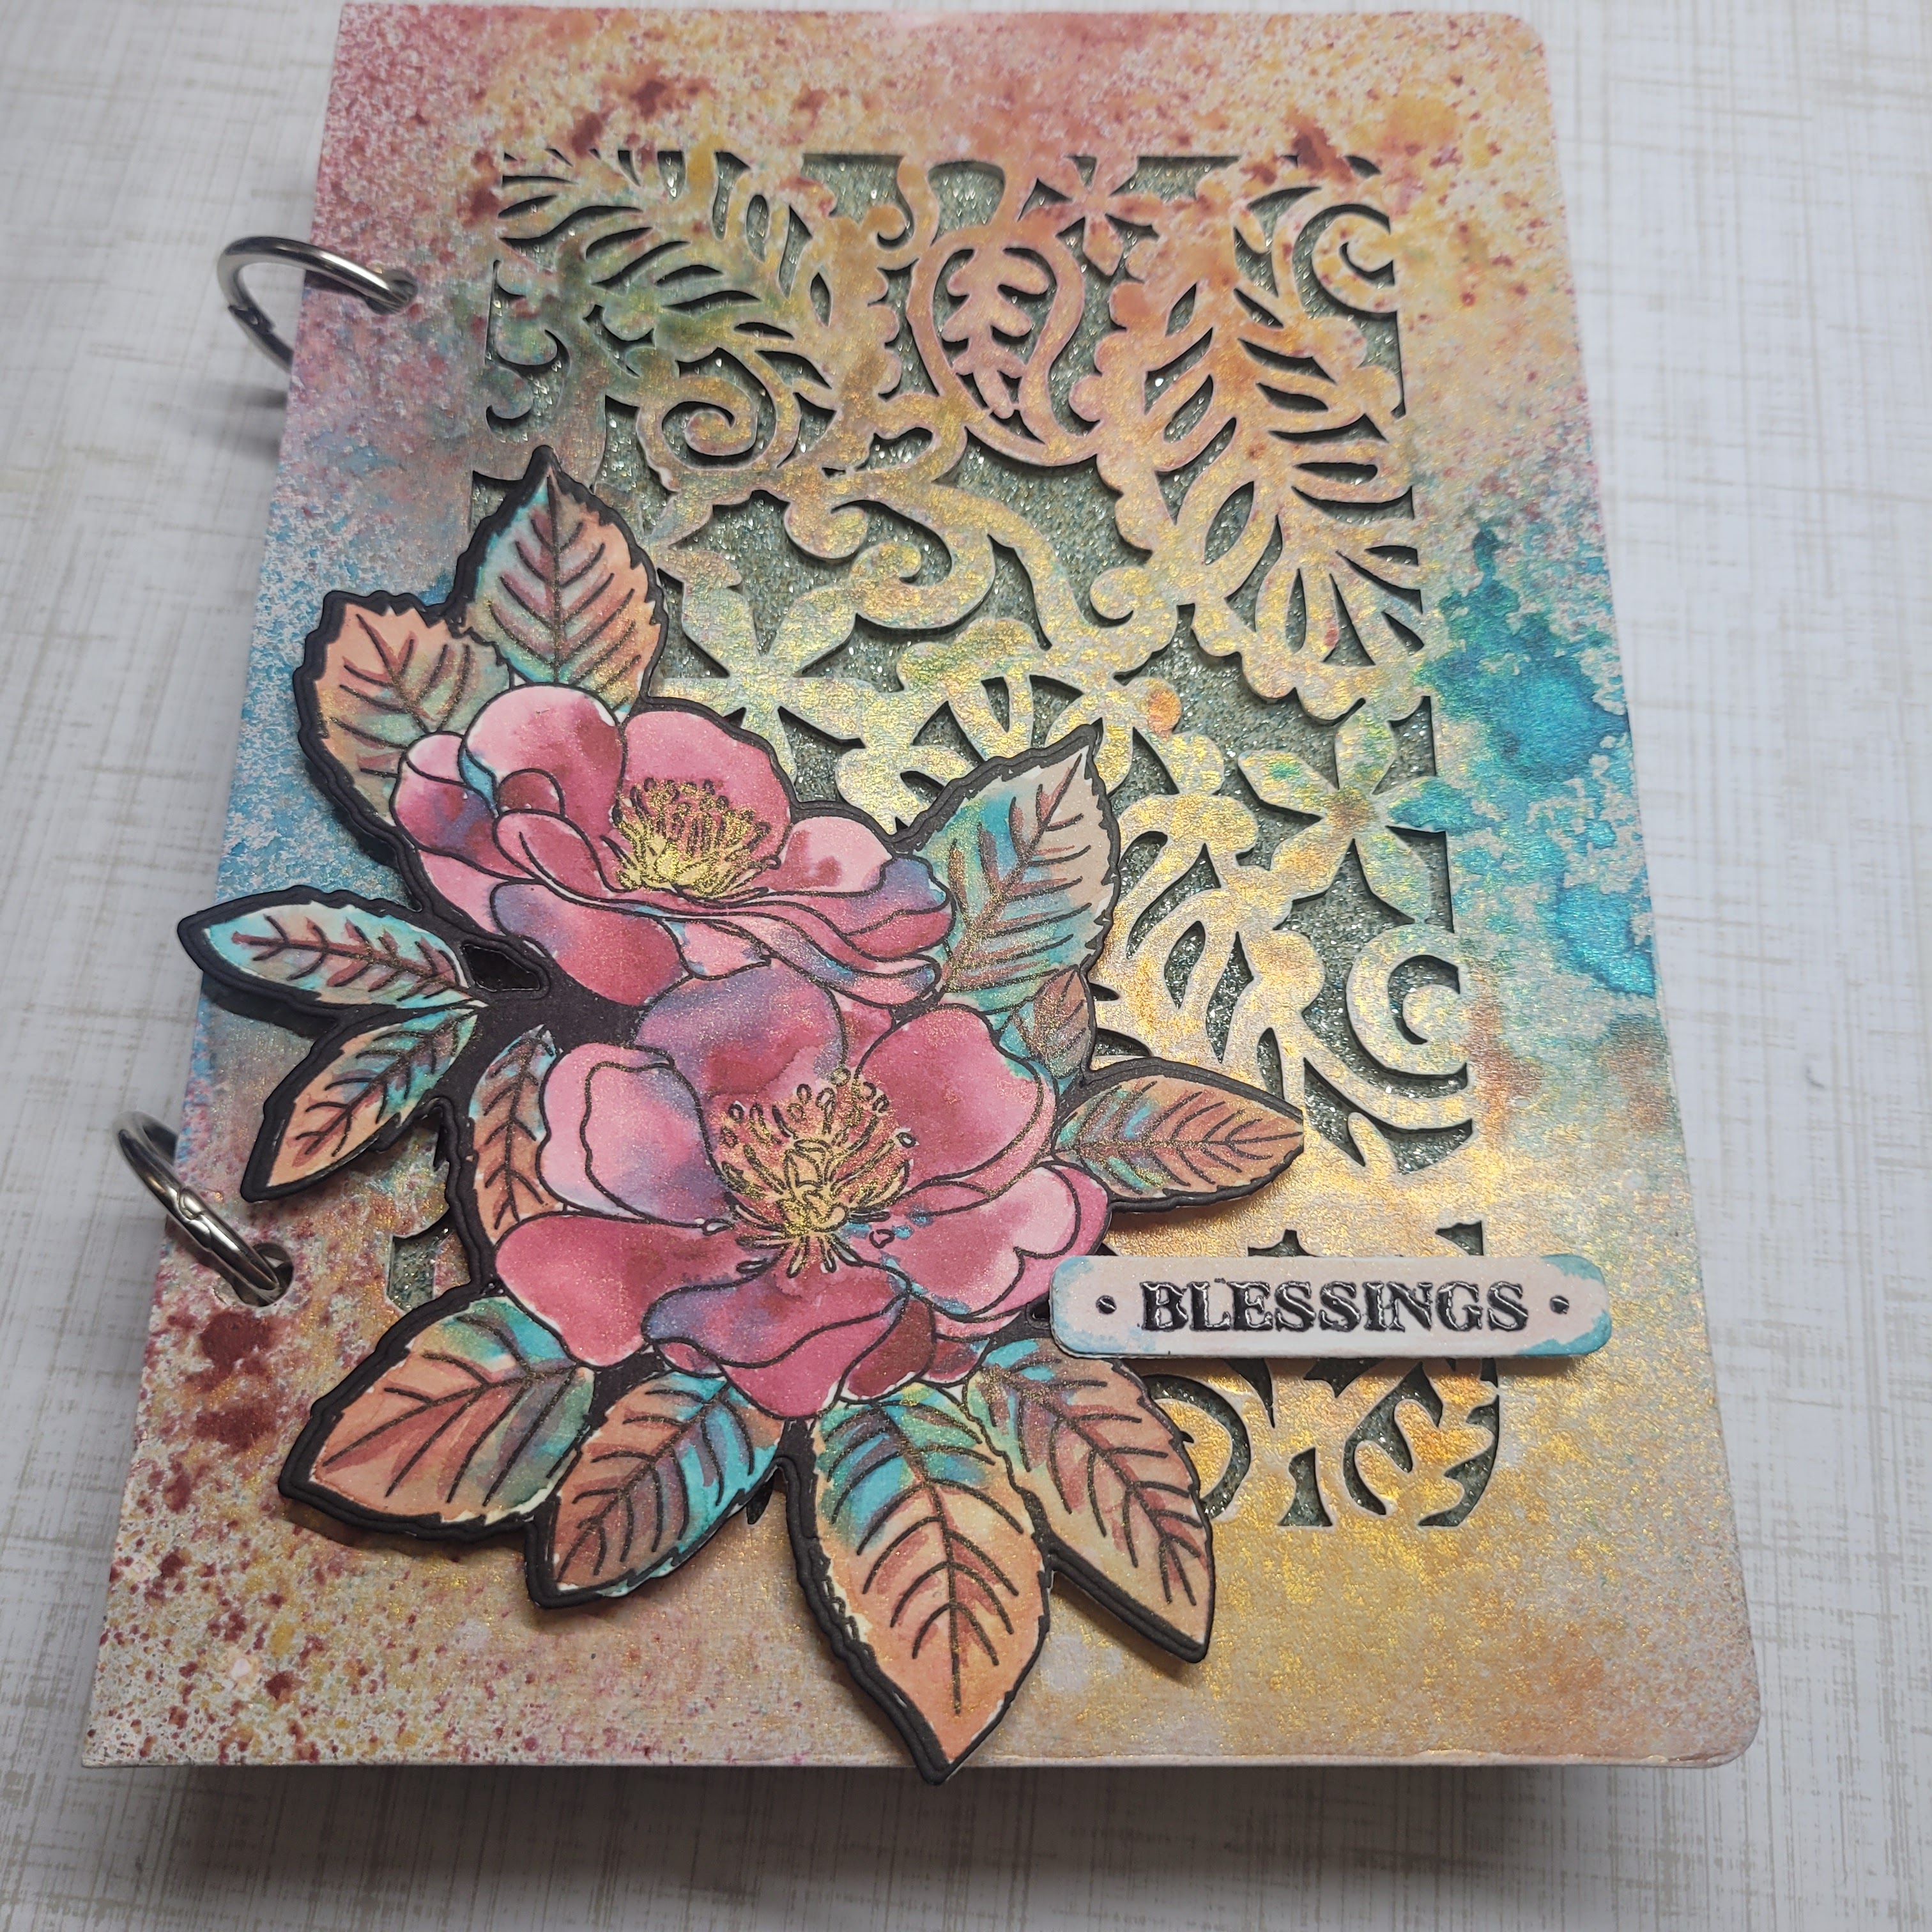
I did both but the first thing I will tell you about is the altered item. I took an old chipboard album that I have had in my stash for literally years - probably at least 10 years and created a Blessings Book. A blessings book is a book that contains various scriptures that detail God's blessings. It is meant to be an encouragement to the receiver/reader. I think I will be sending this to my mom for her birthday next month.
I want to warn you in advance that this is a very photo heavy post. And the post will be quite long as I detail how I created this Blessings Book. Once I got started it didn't take terribly long.
First, I took the chipboard album apart and then took some spray white acrylic paint and covered each page and took a paintbrush to smooth out the paint. After the paint was dry, I took various Altenew and Lindy's Magical Sprays and covered each page in shimmery goodness.


After covering all the chipboard with the sprays I then sprayed a bit of each color used onto my glass mat and got out my Altenew watercolor paintbrushes and painted my floral image. Just the spray and a little water is all it took. My floral image is from the Altenew Lovely Camelias set.


I layered the color until I got the affect I wanted. I let the image dry and then used the coordinating die to cut out the floral image.
Next, I took a piece of vellum and applied double sided adhesive to it. I show an easy way to line up the vellum with the adhesive below. First, I cut the adhesive the same size as the vellum. Then I add peel up a corner of the adhesive and put it in my score board right up against the edge, I lay the vellum on top making sure both are flush against the corner. Then, I slowly peel the adhesive backer off until the vellum completely covers the adhesive. Burnish with your fingers and you have a perfect piece of vellum with adhesive on it.


One thing I did to "step up" the technique on this altered item was to use this vellum as a backer to the front page of the chipboard book. The front is intricately cut and you could see through to the pages behind so I layered the vellum onto the back of the front page. Then I used some vintage glass glitter that I have had in my stash probably as long as the chipboard. I applied that through the cutout and it adhered onto the vellum giving it a nice look while obscuring what is in the book.


The next step was to take the scripture I had printed onto cardstock cut into a size that would fit onto the inner pages of the Blessings Books. Then I used a decoupage glue and adhered each page onto the chipboard pages.


I added foam tape to the back of the watercolored floral image and placed it on the bottom left of the album.
 |
The first page of the Blessings Book.
|
 |
| The final result. |
I did create an item by recycling or upcycling Altenew Bubble mailers that my orders had come in. I created a little box or bin to put things in.


 I started working on my Final for AECP Level 2. One of things we needed to do was to either Upcycle/Recycle something or submit an altered item.


Absolutely brilliant, Angy! Not one but two items! Wow! AMAZEBALLS!!
ReplyDelete